Permissioning is a feature that allows you to choose whom you share particular files or folders with in your Data Room. This allows you to add all your files to a Data Room and choose which Users are allowed to view which files.
What are the Different Permission Groups?
There are 4 default Permission Groups:
- Admin: The administrator of the data room has the ability to manage all aspects of the Data Room from naming the room to managing users to viewing analytics for the room.
- Manager: The manager can manage all aspects of the files and folders of the data room, but cannot manage users or their permission groups, nor can they view the analytics for the room.
- Viewer: The user cannot upload any new files/folders to the Data Room or manage users. They can only view and download files/folders that exist in the Data Room.
- No Access: If you wish to remove a user from the Data Room, but not have their analytics deleted, you can give them No Access which preserves their analytics, but prevents them from accessing the Data Room.
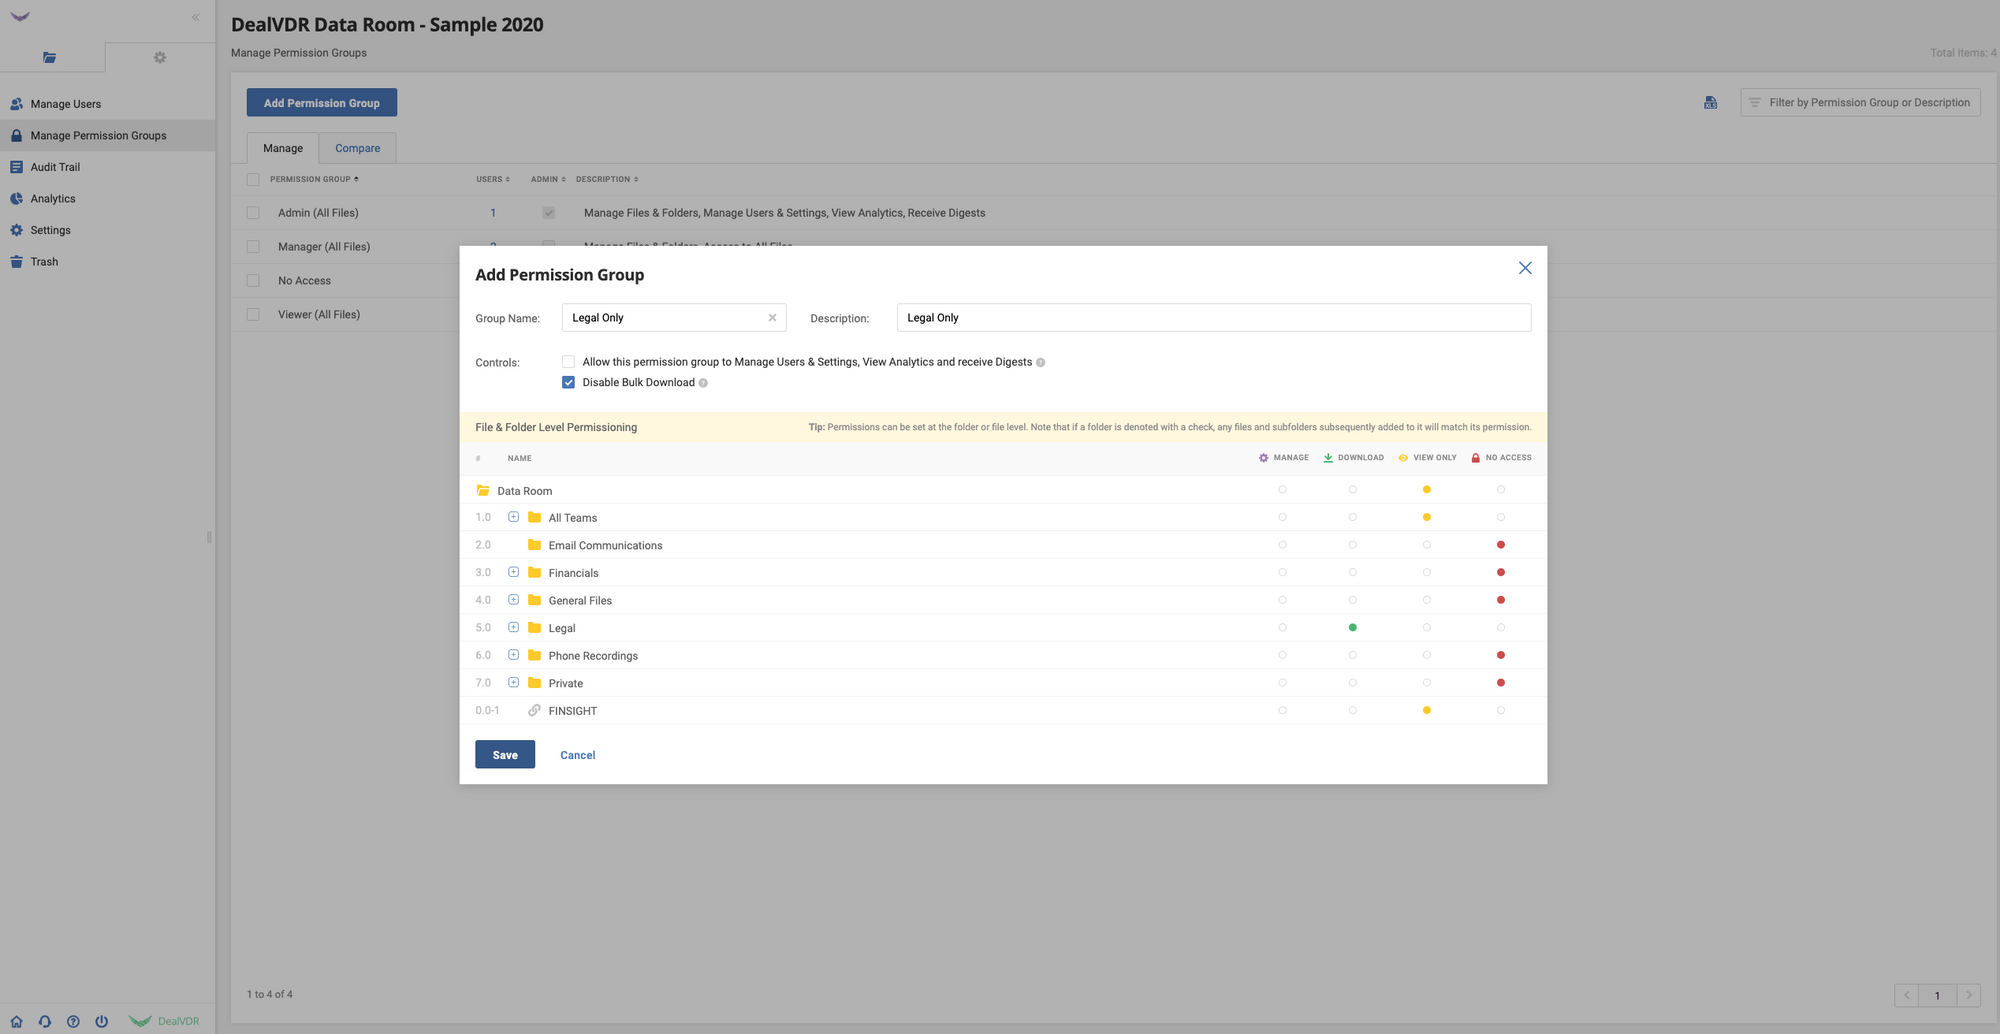
A key feature of our Data Rooms is being able to add custom Permission Groups. Creating a custom Permission Group allows you to choose which files/folders users in that group can access or manage, and what other features they have access to.
Who Can Assign Permissions
Admins and users given Manage Users & Settings permissions are able to add Permission Groups and assign Permissions.
How to Create Permission Groups
Creating a Permission Group is simple and can be done in minutes:
- As an Admin, go to your Data Room's Manage Users & Settings tab
- Click on Manage Permission Groups
- Click on Add Permission Group
- Create a Group Name and give it a Description
- You can select/unselect certain Controls for the Permission Group: (1) you can allow this group to view analytics and receive digests, as well as manage users and settings. This is akin to Admin-level permissions. (2) You can also disable bulk download which prevents users from downloading multiple files at a time.
- In the folder tree, you can choose which folders, subfolders, and files this group has access to. You can set each file/folder to Manage, Download, View Only, or No Access. This gives you the ability to choose which files/folders different Users (assigned to this Permission Group) can view, and to what level they can access it.
How to Assign Permission Groups
You may assign Users to one of the 4 default Permission Groups or to a custom Permission Group. This can be done in one of two ways:
Manage Users Tab:
- In the Manage Users tab, select the User(s) to whom you wish to assign Permission Groups
- Select the Edit Permissions icon next to Add Users
- Select the Permission Group(s) you wish to add them to. Selecting multiple Permission Groups will give the User permissions from both the Permission Groups. Alternatively, you may Revoke Access for a User which will remove their ability to view the Data Room or its contents.
- Press Save
Manage Permission Groups Tab:
- In the Manage Permission Groups tab, notice the Users column to the right of the Permission Group column
- The number displayed indicates the number of Users assigned to this Permission Group. Clicking on the number will open the Add or Remove User(s) modal.
- Select which User(s) you wish to assign to this Permission Group from the list of Contacts.
- Press Save
View Data Room As User
A key feature when assigning Users to Permission Groups is the ability to view the Data Room as that User to ensure that they have access to the files just as you specified. To view a Data Room as a User:
- Go to Manage Users
- Under the Last Login column for a User, select the View data room as user icon.
This will open the Data Room folder tree as well as the User's permissions for each file/folder. Here, you can verify which folders the User can Manage, Download, View Only, or have No Access to.